[OUTDATED] Setting Up and Using DNScrypt-Loader

##:warning: THIS TUTORIAL ONLY WORKS WITH DNSCRYPT VERSION 1.9.1 OR EARLIER :warning:
See: dnscrypt-proxy v1.9.3 doesn't work with dnscrypt-loader · Issue #11 · GortCodex/DNSCrypt-Loader · GitHub
If you wish to use DNScrypt 1.9.3 and later, use this tutorial: GitHub - pi-hole/pi-hole: A black hole for Internet advertisements


This tutorial is based on Debian 8, results may vary. This tutorial will help you easily set up DNScrypt. Bits and pieces of this tutorial will be pulled from GitHub - pi-hole/pi-hole: A black hole for Internet advertisements.

##Install packages (from wiki):

sudo apt-get update
sudo apt-get -y install build-essential tcpdump dnsutils libsodium-dev 
sudo apt-get -y install locate bash-completion libsystemd-dev pkg-config

##Building DNScrypt (from wiki):

mkdir -p dnsproxy
cd dnsproxy
wget https://download.dnscrypt.org/dnscrypt-proxy/dnscrypt-proxy-1.9.1.tar.gz
tar -xf dnscrypt-proxy-1.9.1.tar.gz
ls
cd dnscrypt-proxy-1.9.1
sudo ldconfig
./configure 
make
sudo make install

##Installing DNScrypt-Loader
Assuming we're still working in ~/dnsproxy/

Necessary package if not already installed:

apt-get install gawk

Downloading DNScrypt-Loader files (GitHub - GortCodex/DNSCrypt-Loader: A flexible and customizable bash script to manage DNSCrypt-proxy)

wget https://github.com/GortCodex/DNSCrypt-Loader/archive/v1.2.tar.gz
tar -xf v1.2.tar.gz
cd DNSCrypt-Loader-1.2

##Setting Up DNScrypt-Loader

sudo ./install-loader-debian

After you run the command you will see a prompt, press OK.

After that you will come to this screen:

Choose option 1 to Install DNSCrypt-loader

When you see this screen, choose YES to continue:

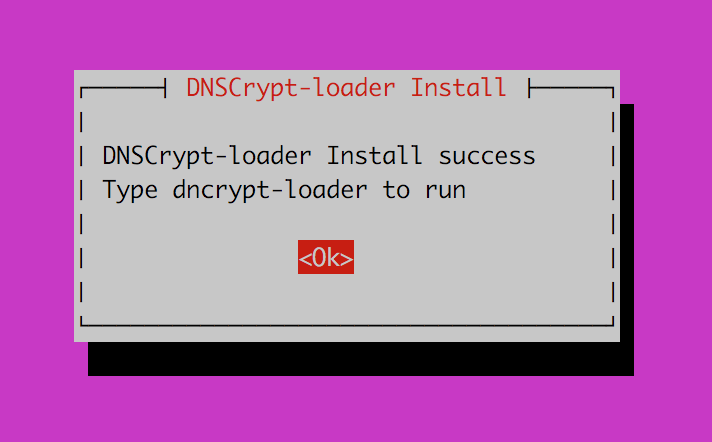
On successful installation you will see:

After you click on OK you will be redirected to the main page.

OPTIONAL STEP This time, choose option 2 to enable DNSCrypt to automatically start at boot.

When done, you can choose option 5 to quit or tab to CANCEL

##Configuring DNScrypt-Loader for use

nano /usr/local/sbin/dnscrypt-loader

Change these lines from:

cPrimaryIP="127.0.0.1"
cPrimaryPort="5553"

cSecondaryIP="127.0.0.1"
cSecondaryPort="5554"

to

cPrimaryIP="127.10.10.1"
cPrimaryPort="5553"

cSecondaryIP="127.10.10.2"
cSecondaryPort="5554"

or any ip / port you want... When done, EXIT and SAVE.

##Using DNScrypt-Loader

Launch DNScrypt-Loader using

sudo dnscrypt-loader

You should see a screen like such:

  • Your first step should be to choose option 7 to Update resolver.csv from official source

  • When you're done with that, choose option 1 to Set a Primary DNS resolver. Choose a resolver from the list. You can also set a secondary resolver.

  • Use this list to help you choose the best resolver. You should go for the ones that don't keep logs. (https://github.com/jedisct1/dnscrypt-proxy/blob/master/dnscrypt-resolvers.csv)

  • When you're done, you can choose option 10 to QUIT or tab to CANCEL

##Change DNSmasq config (from wiki):

sudo nano /etc/dnsmasq.d/02-dnscrypt.conf

add the following:

server=127.10.10.1#5553
server=127.10.10.2#5554

or whatever ip/port combination you chose to use.

From

sudo nano /etc/pihole/setupVars.conf

Comment out:

#piholeDNS1=...
#piholeDNS2=...

From

sudo nano /etc/dnsmasq.d/01-pihole.conf

Comment out

#server=...

Then

sudo service dnsmasq restart

##Testing your setup

Use http://dnsleaktest.com to ensure you've successfully set up DNScrypt-proxy.

##Upgrading and Uninstalling DNScrypt:

https://discourse.pi-hole.net/t/setting-up-and-using-dnscrypt-loader/606/5

3 Likes

Seems to be working fine, thanks!

I think 'lsof' command is needed on Raspbian though, should be added under 'install packages' perhaps? I got a 'command not found' sometimes when using dnscrypt-loader menu. Appeared to work anyway though..

Thanks for this, just what I needed... :slight_smile:

so when pihole change the setupVars.conf file i have to reedit it again?
if so, then it would be nice to have customVars that gets merged with setupVars

btw thanks for the tutorial

here is a list of resolvers
https://github.com/jedisct1/dnscrypt-proxy/blob/master/dnscrypt-resolvers.csv
so you can check for no logs, dnssec, .. and so on :stuck_out_tongue:

Whenever you update pihole, it will read from setupVars and apply the settings to /etc/dnsmasq.d/01-pihole.conf.

Anything that's changed in /etc/dnsmasq.d/01-pihole.conf will get overwritten with what's in setupVars.

To answer your question, no you won't have to re-edit this file.

EDIT: added resolv list to tutorial, thanks

Since dnscrypt is also a very alive project, the version changes regularly. How to update your installation (if you used the installation instructions from firestorrrm) - tested, upgrade from 1.8.1 to 1.9.1:
assumptions:
dnscrypt-proxy-x.x.x.tar.gz is the old version (currently running)
dnscrypt-proxy-y.y.y.tar.gz id the new version

  • Determine the new version number: check this site to determine the last version number, look for the file dnscrypt-proxy-y.y.y.tar.gz with the highest version number.
  • cd into the dnscrypt folder (if you followed the instructions from firestorrrm):
    cd dnsproxy
  • Download the file (you need to do this before making changes, DNS doesn't work during the upgrade):
    wget http://download.dnscrypt.org/dnscrypt-proxy/dnscrypt-proxy-y.y.y.tar.gz
  • Unpack the new version:
    tar -xf dnscrypt-proxy-y.y.y.tar.gz
  • Stop dnscrypt-proxy:
    sudo dnscrypt-loader
    select option 8 (Stop DNSCrypt-proxy)
    select option 10 (Quit)
  • cd into the old version folder (if you used the installation instructions from firestorrrm):
    cd dnscrypt-proxy-x.x.x
  • uninstall the old version
    sudo make uninstall
  • cd into the new version:
    cd ../dnscrypt-proxy-y.y.y
  • Install the new version:
    sudo ldconfig
    ./configure
    make
    sudo make install
  • Verify the new version number
    dnscrypt-proxy --version
  • Reboot:
    sudo reboot
  • Check if everything works, browse to this and select "Standard test", the test should return your configured DNScrypt server
1 Like

Ah thanks for the heads up, I edited the tutorial accordingly.

Hi, I ran into a small problem using this guide and googling the problem did not lead to any answers. After installing the DNS Crypt loader, I am having an issue running sudo dnscrypt-loader. The error message I am getting is that the path to the resolver.csv files on the dns-crypt loader setup differs than the dns-crypt proxy setup. I doubled check the file paths and everything seems to point to the right folder, so I am not sure on how to fix this. Any advice? I can provide more information on my RPi 3 that I am trying to install this on. I just have pi Hole installed and nothing else (except for dnscrypt)

I just tried to upgrade from v1.9.1 to v1.9.3: failed. Something seems to be wrong or changed in this version, I reverted back to v1.9.1 (v1.9.1 works)
The relevant syslog error messages (failed v1.9.3):
Jan 19 10:06:06 raspberrypi dnscrypt-loader: The path to resolvers.csv on dnscrypt-loader script
Jan 19 10:06:06 raspberrypi dnscrypt-loader: differs from dnscrypt-proxy setup
Jan 19 10:06:06 raspberrypi dnscrypt-loader: Please change dnscrypt-loader 'cCSVBaseDir' and 'cSIGBaseDir' parameters to
Jan 19 10:06:06 raspberrypi dnscrypt-loader: cCSVBaseDir='/'
Jan 19 10:06:06 raspberrypi dnscrypt-loader: cSIGBaseDir='/'
Jan 19 10:06:06 raspberrypi dnscrypt-loader: Edit script at /usr/local/sbin/dnscrypt-loader
Changing the parameters, as indicated by this message doesn't solve the problem...
After I reverted back to v1.9.1, I checked if the resolver.csv update still works (option 7 in dnscrypt-loader). The resolver files are updated (location /usr/local/share/dnscrypt-proxy). The path matches the configuration in the (unchanged) dnscrypt-loader configuration file (/usr/local/sbin/dnscrypt-loader)

I've submitted an issue here, hope this is the correct place...

Update: There seems to be a problem. For now, use version 1.9.1 of DNScrypt! Read the comments in the above issue. I will update this thread, as soon as something changes.

Update2: I stopped using DNScrypt-proxy-loader altogether, you can read the alternative I used below (four entries down).

I wanted to say thank you for leaving this comment. I was able to get DNS Crypt running successfully using v 1.9.1. Before I was trying to use dnscrypt-loader with dnscryp v 1.9.2 and I was running into the same problems you were.

pihole 2.12 has now dnssec i know dnscrypt != dnssec

Yes it has, but dnssec != dnscrypt. For me dnssec isnt interesting but dnscurve is. Sadly dnsmasq does not seem to be capable of supporting it

I stopped using DNScrypt-proxy-loader altogether, as the development doesn't keep up with the dnscrypt-proxy development. Currently, you cannot use the loader with any version above 1.9.1. I've logged an issue, a couple of weeks ago, but in the mean time v1.9.4 of dnscrypt-proxy has been released, so I was already 3 versions behind...
Instead I've used this guide to configure DNScrypt-proxy directly on the pi (running raspbian jessie lite), with an upgraded dnsmasq (entry of jan 29 - required if you also want to use DNSSEC).
The setup is a little harder, you really need to keep your mind to it, but I think it's worth the effort, as you lose the dependency of the loader.
To make life a little easyer, I've published a rar file, containing the files you need (IPv4 only). Put all five dnscrypt-proxy@ files in /lib/systemd/system (just like the instructions indicate) and 04-dnscrypt.conf in /ec/dnsmasq.d. Remove the server settings from other dnsmasq configuration files! These files are for v1.9.4 of DNScrypt proxy, no clue if they will still work with future versions.
I did change the ports, although a port scan indicates the ports are NOT open to the outside world. I just don't like using ports below 1024, this may interfere with other products using "well known ports".

This configuration works (tested)!

Edit: just read this interesting article. I was also under the assumption the primary resolver would always be used, even though the forward destinations graph on the main page of pihole showed otherwise. For this reason (and my privacy - more resolvers means harder to track), I added to more dnscrypt servers to the rar file (read above) and edited the instructions accordingly.

Edit2: Following the instructions from the guide, I ran: sudo systemctl status -l dnscrypt-proxy@* and noticed a warning, stating the system (our raspberry pi) doesn't have enough "entropy" to generate random numbers. This article provides a solution:

  • sudo apt-get install rng-tools
  • add HRNGDEVICE=/dev/urandom to /etc/default/rng-tools
  • reboot the system
    The output of sudo systemctl status -l dnscrypt-proxy@* will no longer show these warnings.
1 Like